

The best part of owning a mechanical keyboard is the freedom to modify and tune it to your liking. This freedom is what separates mechanical keyboards from other options. However, being able to adjust your keyboard shouldn’t be too costly. Out of the many mod options floating around, we’ve discovered the PE foam mod as a worthy contender. The mod is relatively inexpensive and easy to complete while providing a more comfortable typing experience.
In this article, we’ll be going over what the PE foam mod is, how it affects a keyboard, and much more. This will give you an idea of how the mod works so you can ultimately decide if the change is right for you.
What is the PE Foam Mod?
The PE foam mod is a keyboard modification completed by placing a thin layer of polyethylene foam (PE foam) between a keyboard’s PCB and plate. Owlab’s Jelly Epoch originally popularized the mod. It was discovered that removing the foam which sits between the plate and PCB would eliminate the board’s unique sound signature. The tape mod is often combined with the PE foam mod for an even better sound signature. If you’re interested, we have a full article on the tape mod shown here. Polyethylene foam is generally used as a packing material, and it is easy to obtain. The result is a “marbled” sound that is often desired in the keyboard community.

What does the PE Foam Mod do?
The PE foam mod often results in a “poppier” and “marbled” sound signature. By “marbled” we mean a premium and well-rounded sound signature. However, it can also make some switches higher pitched while making other switches sound lower pitched. Many factors such as mounting style, switches, plate material, and more can affect the mod’s effect on a keyboard. The mod also grants a softer typing feel which is more comfortable for countless users. In the next header, we’ll dive into what is causing the change in sound and how it all works.

How does the PE Foam Mod work?
It’s hard to dissect exactly how the PE foam mod works but nearLucid’s video covers the topic remarkably well. We urge you to watch their video on the topic. However, please note our summary of nearLucid’s findings. The foam mod impacts a keyboard’s low and/or high frequencies while retaining the mid frequencies. One switch may sound deeper as a result of the foam mod while another switch may sound higher. As an example, Gateron Black Ink V2s (a deeper sounding switch) would generally sound even deeper after the application of PE foam. However, JWK switches (higher sounding switches) would have a higher sound signature with the addition of foam. The modification’s sound is harder to predict and describe. Though keep in mind, all keyboards will certainly sound more “marbled” with foam.
Does it Matter What PE Foam I Use?
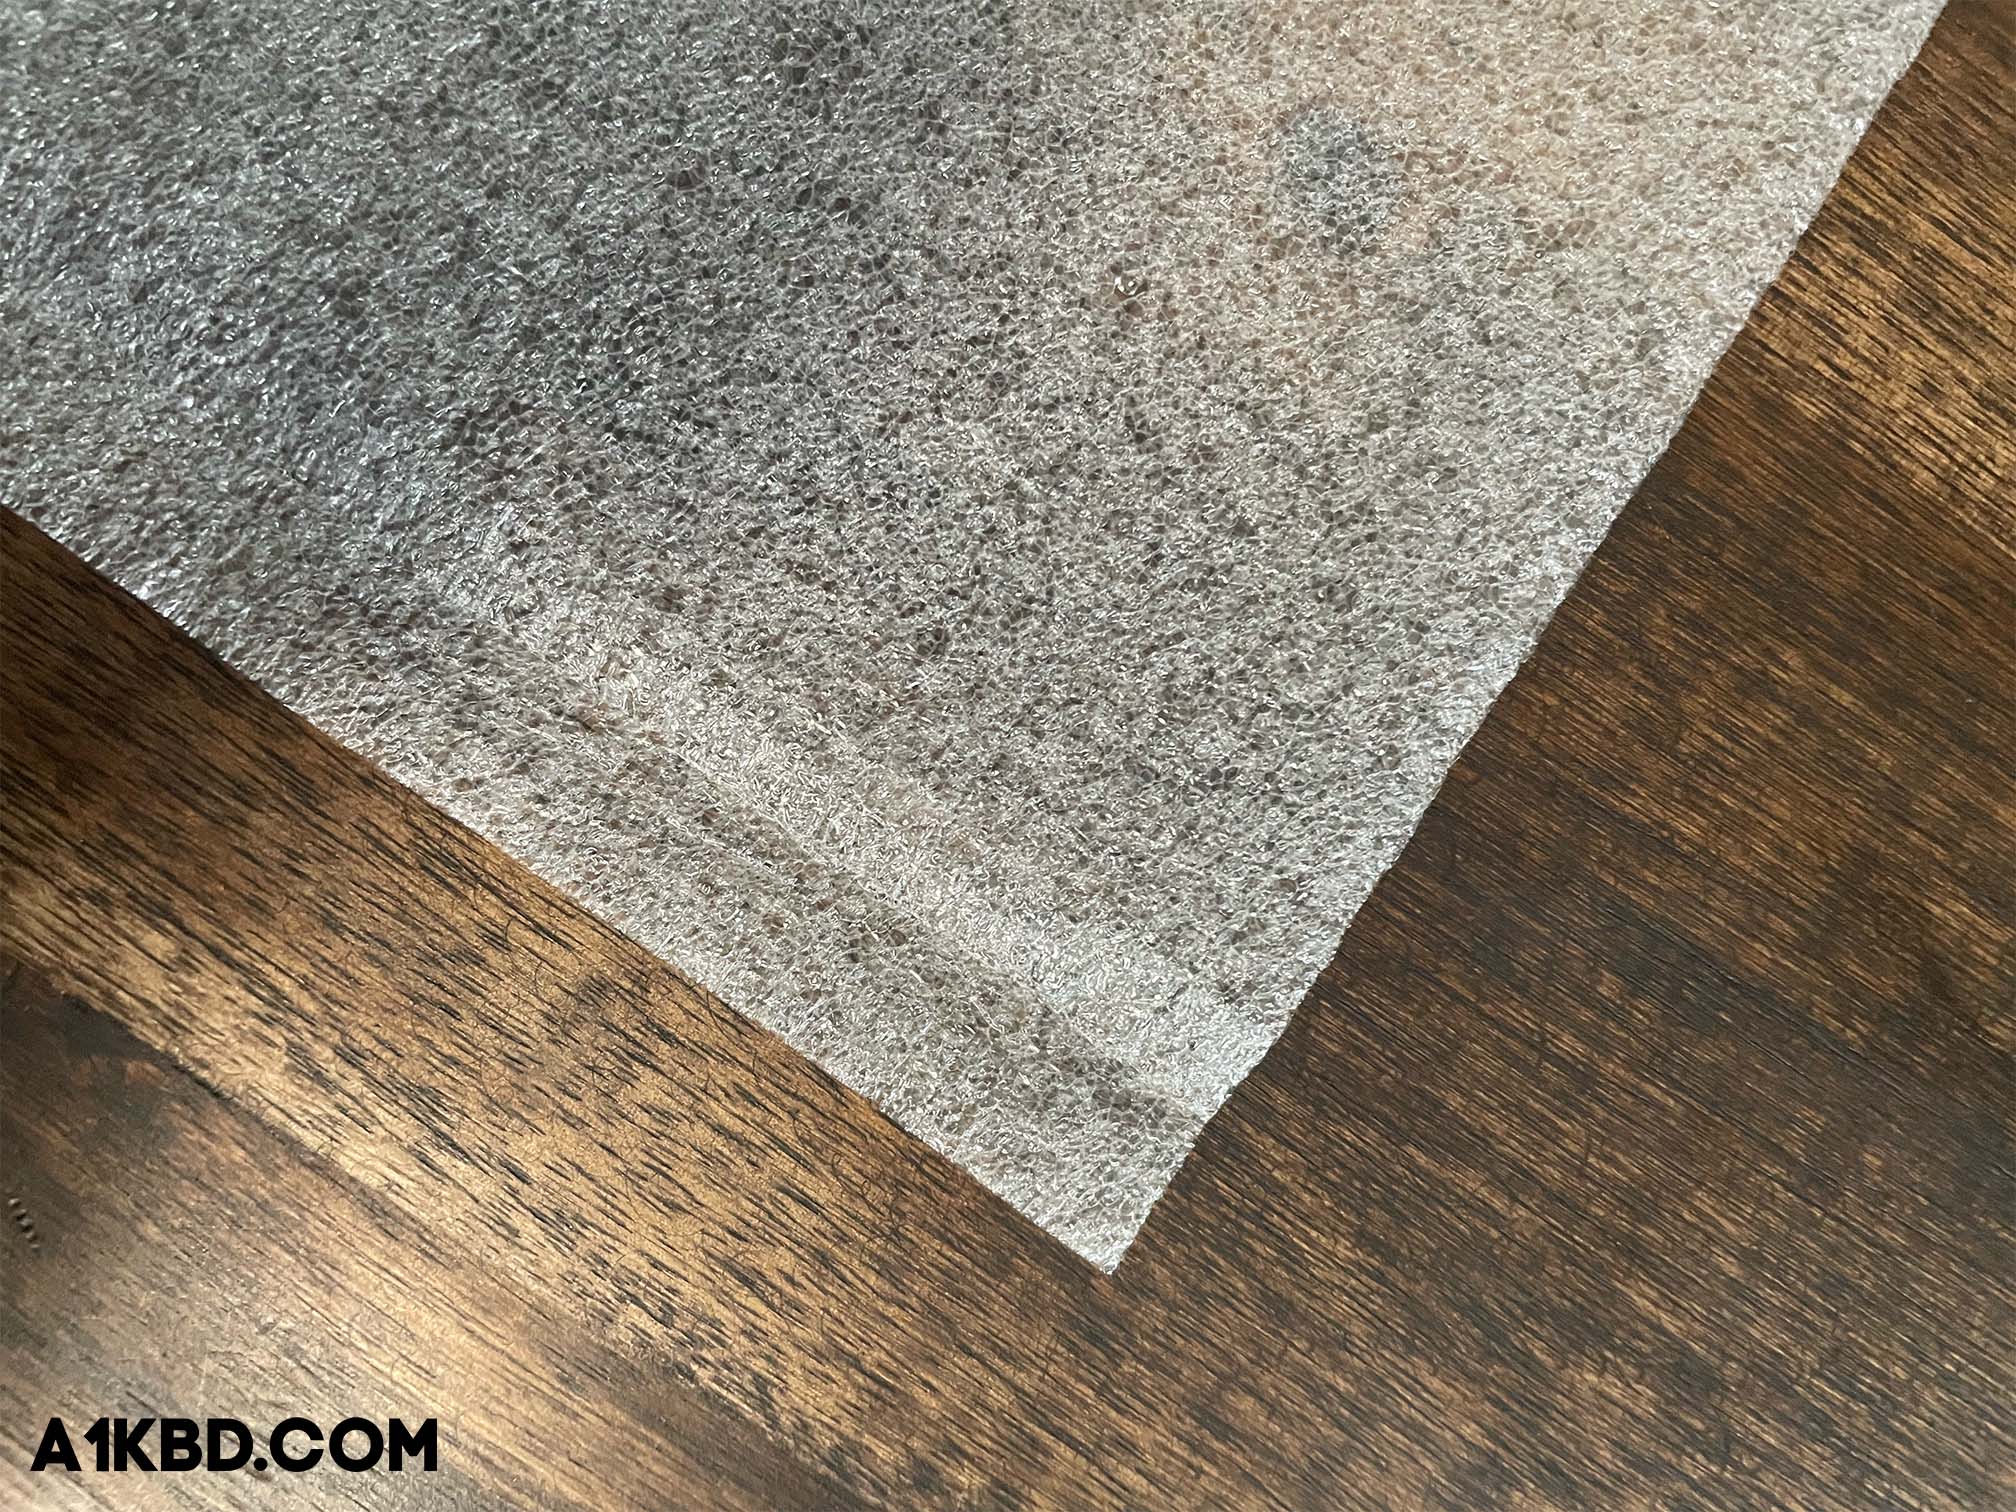
The short answer to this question is yes. The type of foam you use does matter. A lot of keyboard enthusiasts have urged consumers to buy anti-static PE foam, however, this isn’t as necessary as some think. Most modern keyboard PCBs are extremely resistant to static, however, if you’re extra cautious, you may want to use an anti-static foam. In our opinion, either option would work fine.
As a disclaimer, avoid completing this modification with black PE foam, as black PE foam contains carbon which is indeed conductive. Using a black foam risks damaging your PCB.
How Thick Should PE Foam Be?
PE foam should be a maximum of 0.5mm thick for optimal results. It’s important for the switches to properly fit without the foam interfering with a PCB’s hot-swap abilities. Using a foam that is too thick can also risk bending a switch’s very fragile pins.
4 Steps to the PE Foam Mod
With careful guidance, the PE foam mod is an easy task. That’s why we created 4 optimal switch filming steps. These steps include disassembling your keyboard, cutting the PE foam to size, cutting holes out for the stabilizers/switches, and reassembling the keyboard.
Step #1. Disassemble your Keyboard
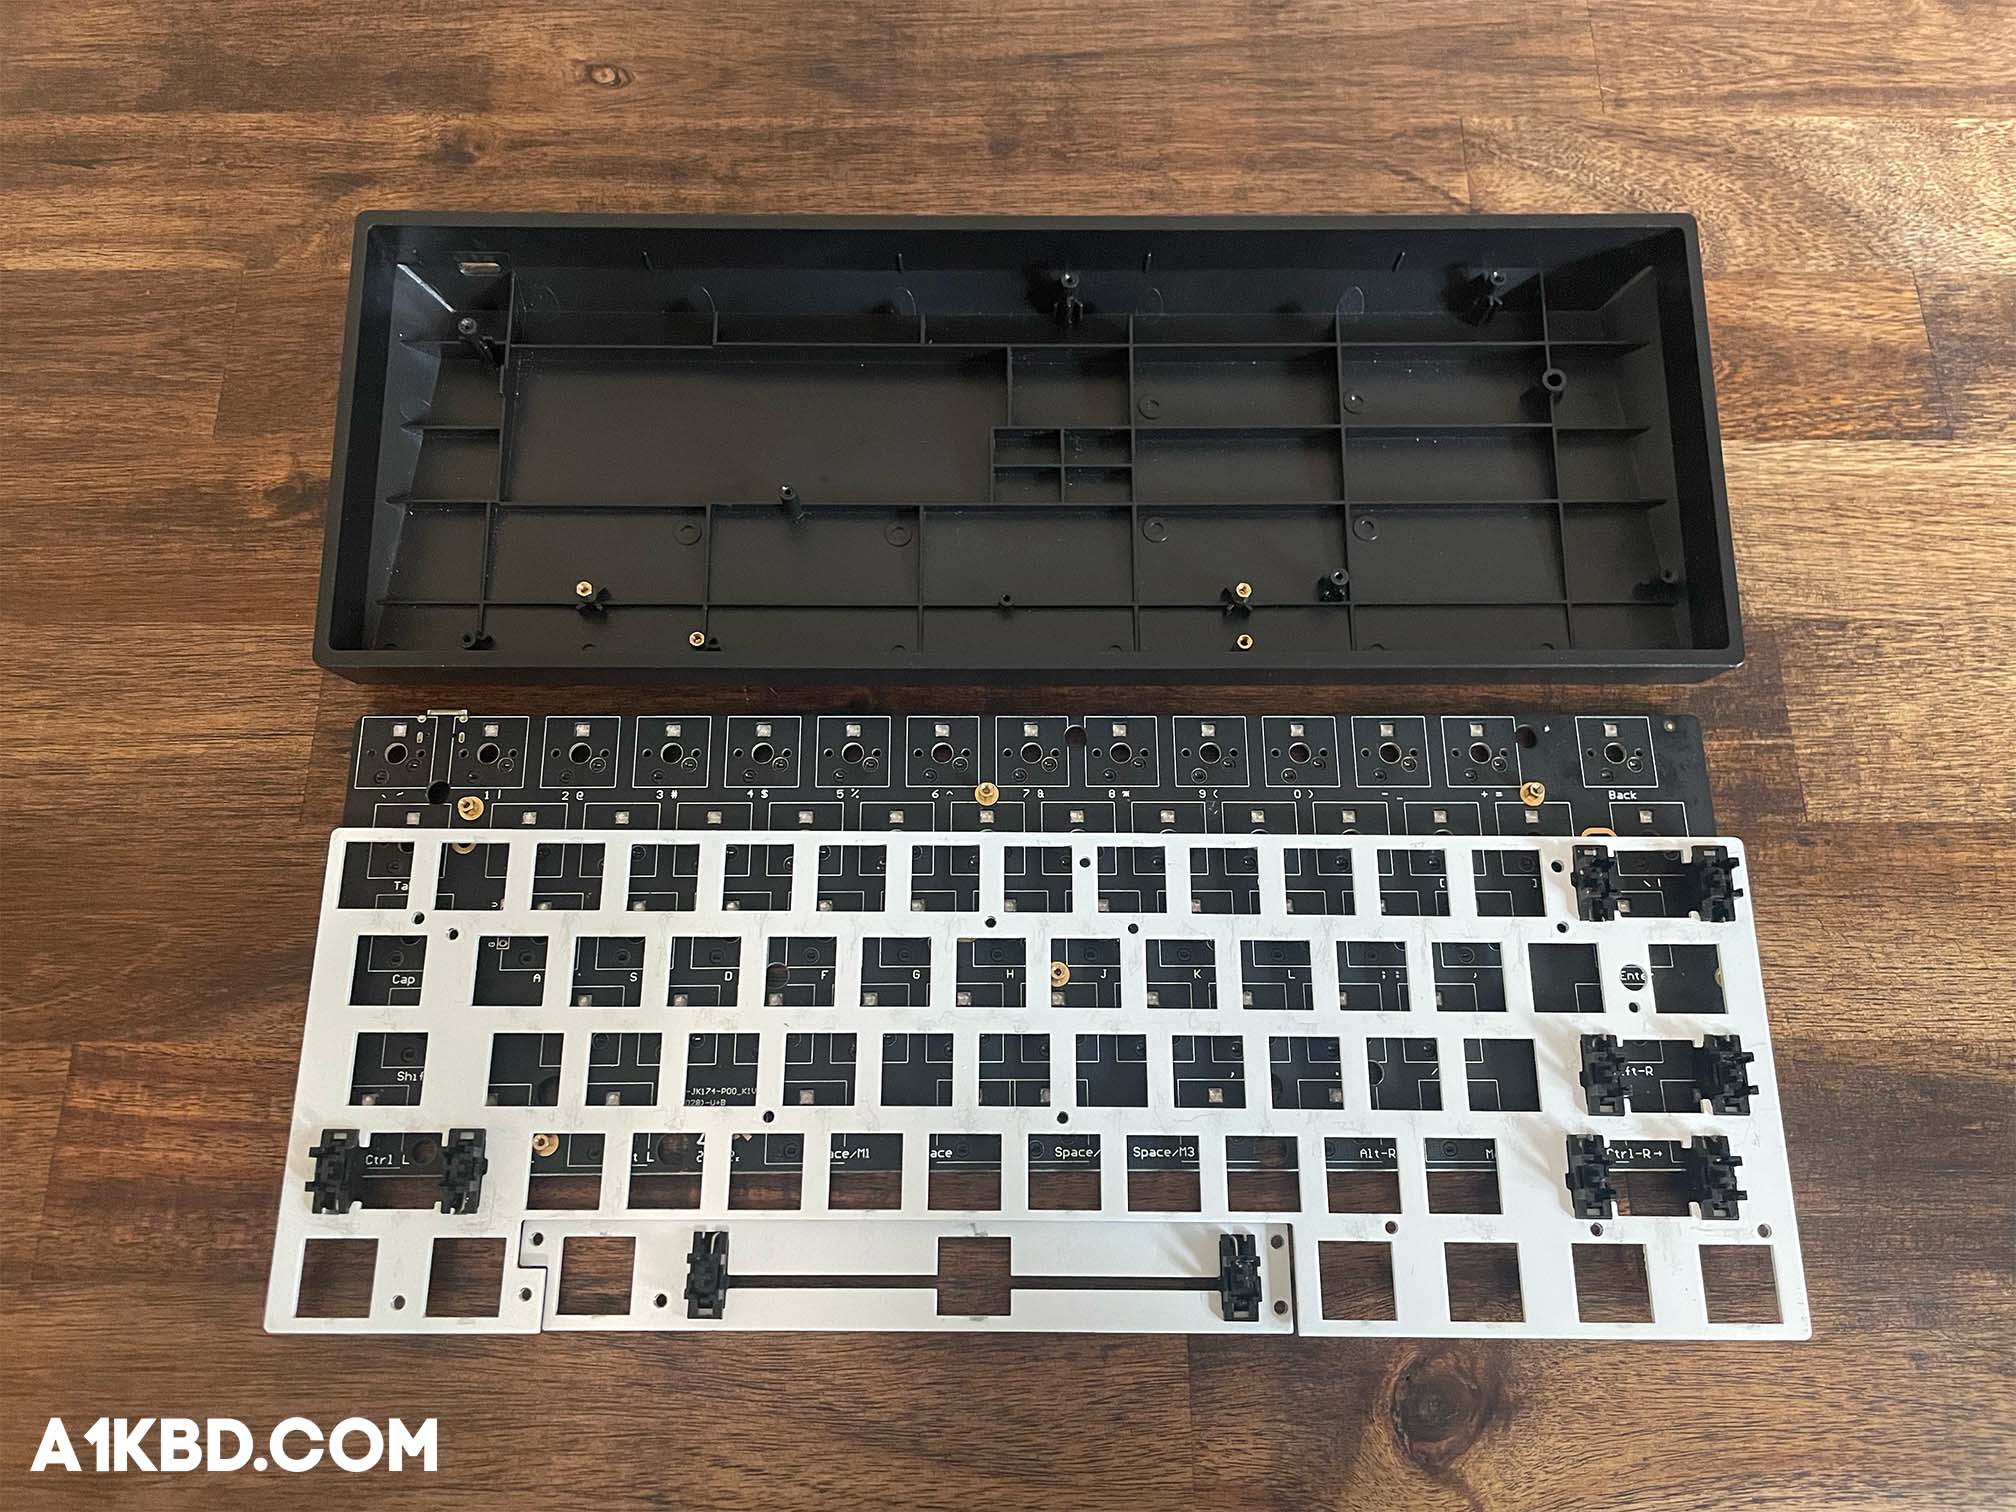
The first step to disassembling a keyboard is removing its keycaps. This can be done through the use of a keycap puller. Removing keycaps will reveal the keyboard’s switches which you’ll want to remove as well. This can be done using a switch puller though make sure your keyboard has hot-swap abilities. Unfortunately, the PE foam mod is exclusive to hot-swap PCBs and will not work with soldered ones. In this article, we’ll detail why the foam mod is limited to hot-swap PCBs and not soldered ones. Once you’ve removed the switches and keycaps from your keyboard, the next move is to take apart the case. Remove the screws from where they are secured so you can separate the PCB and plate from the case. Different keyboards have different methods of assembly/disassembly. If you’re confused about how to take apart your case, please refer to your keyboard manufacturer’s website.
Step #2. Cut the PE Foam to Size
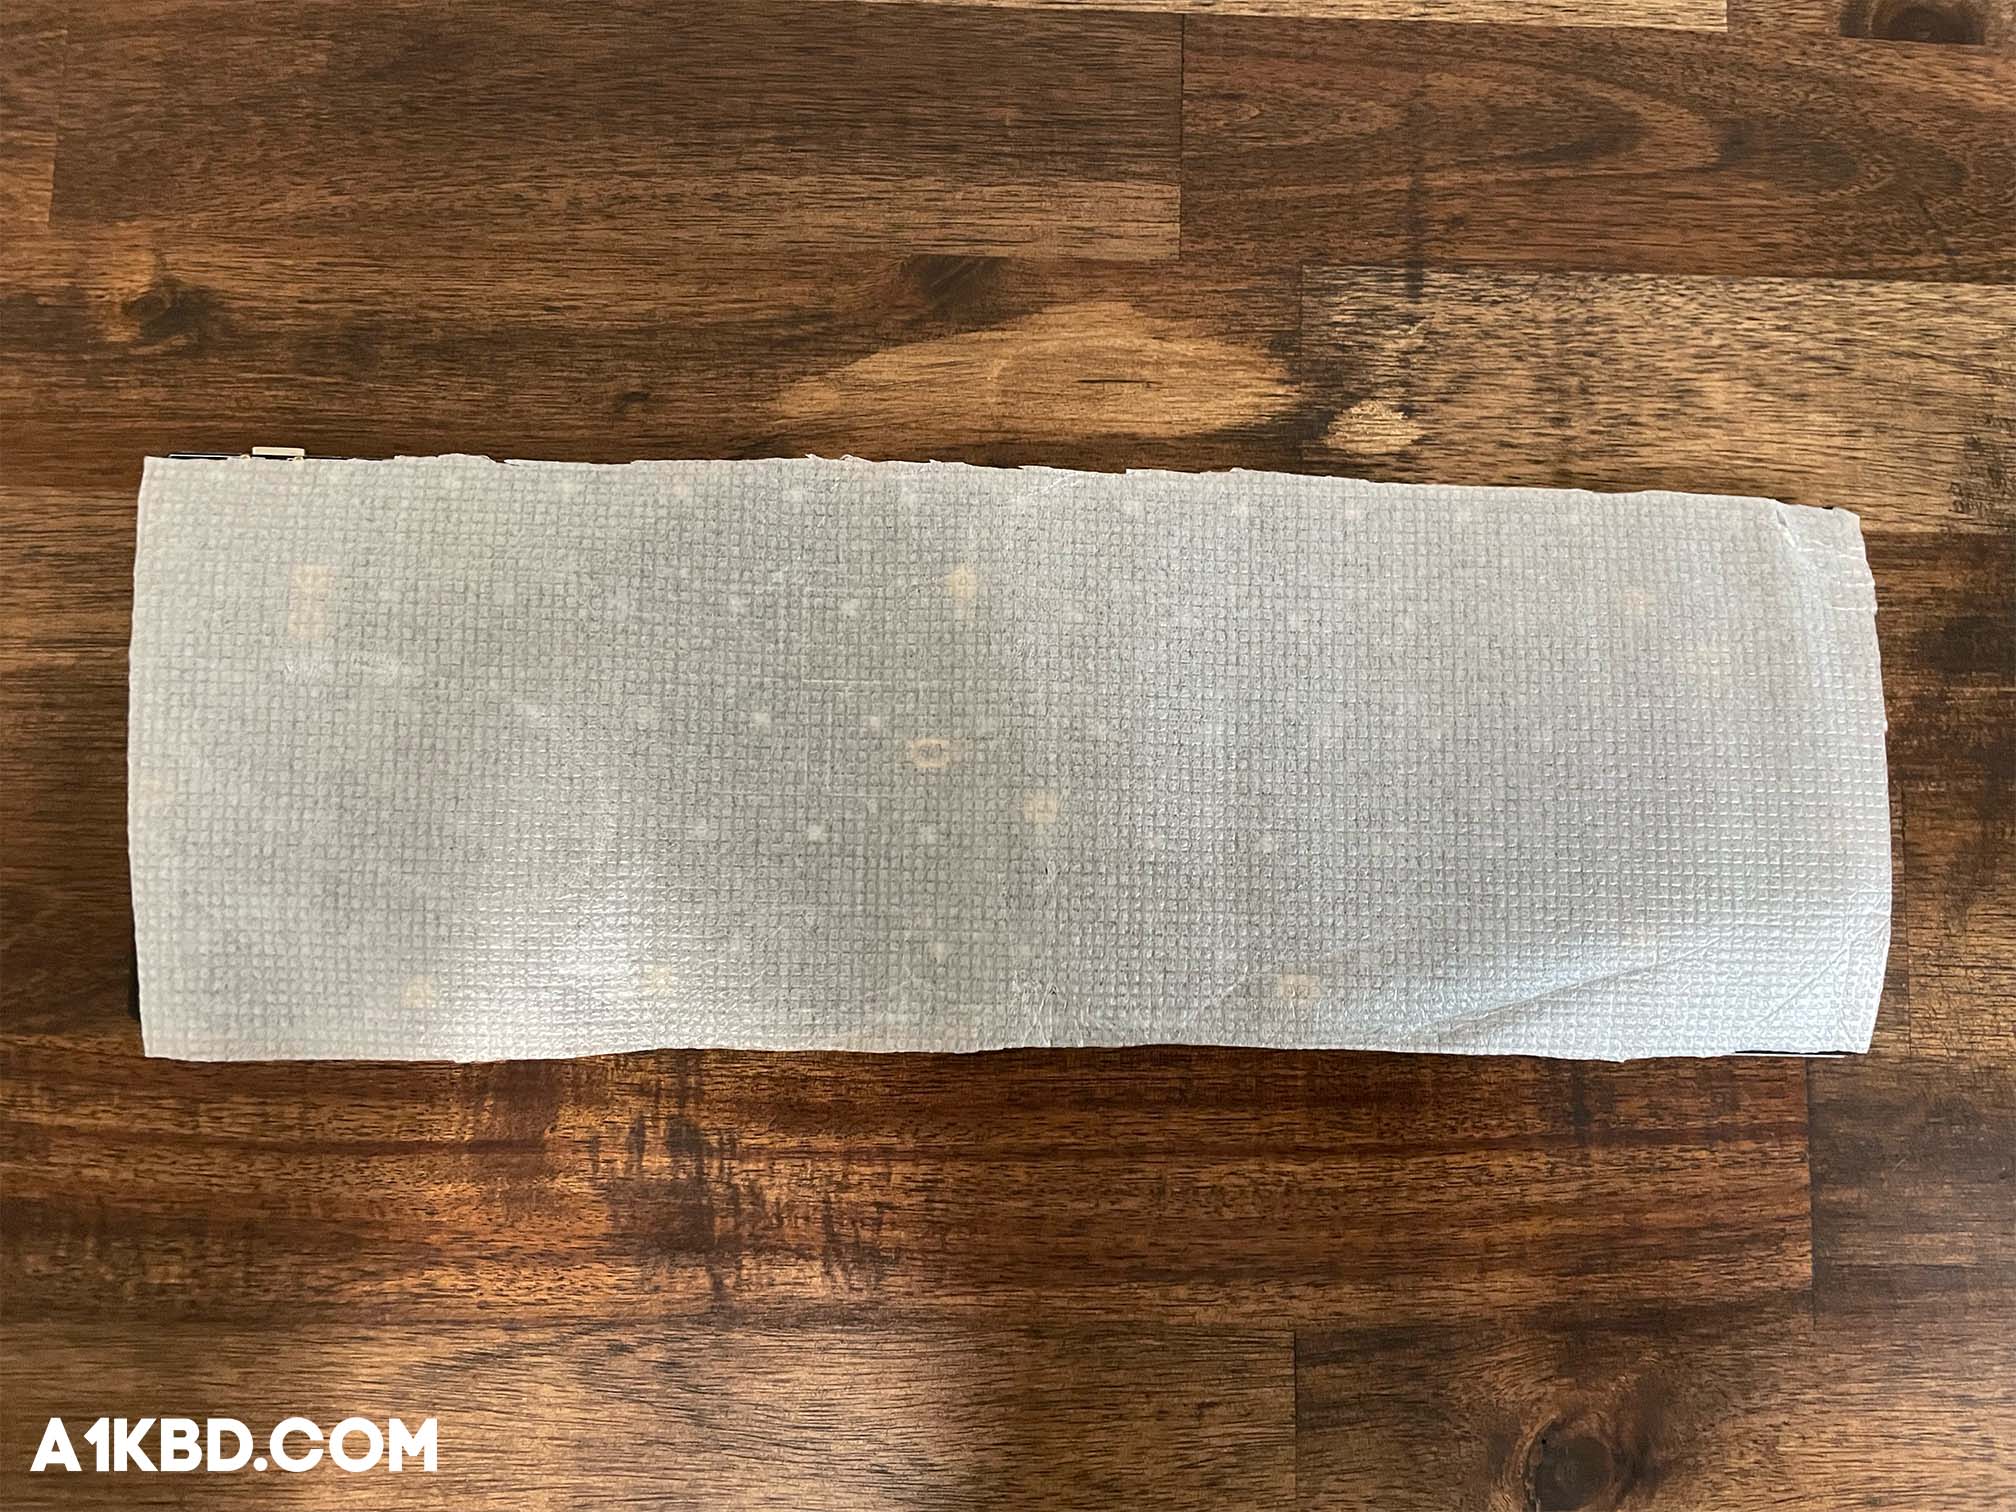
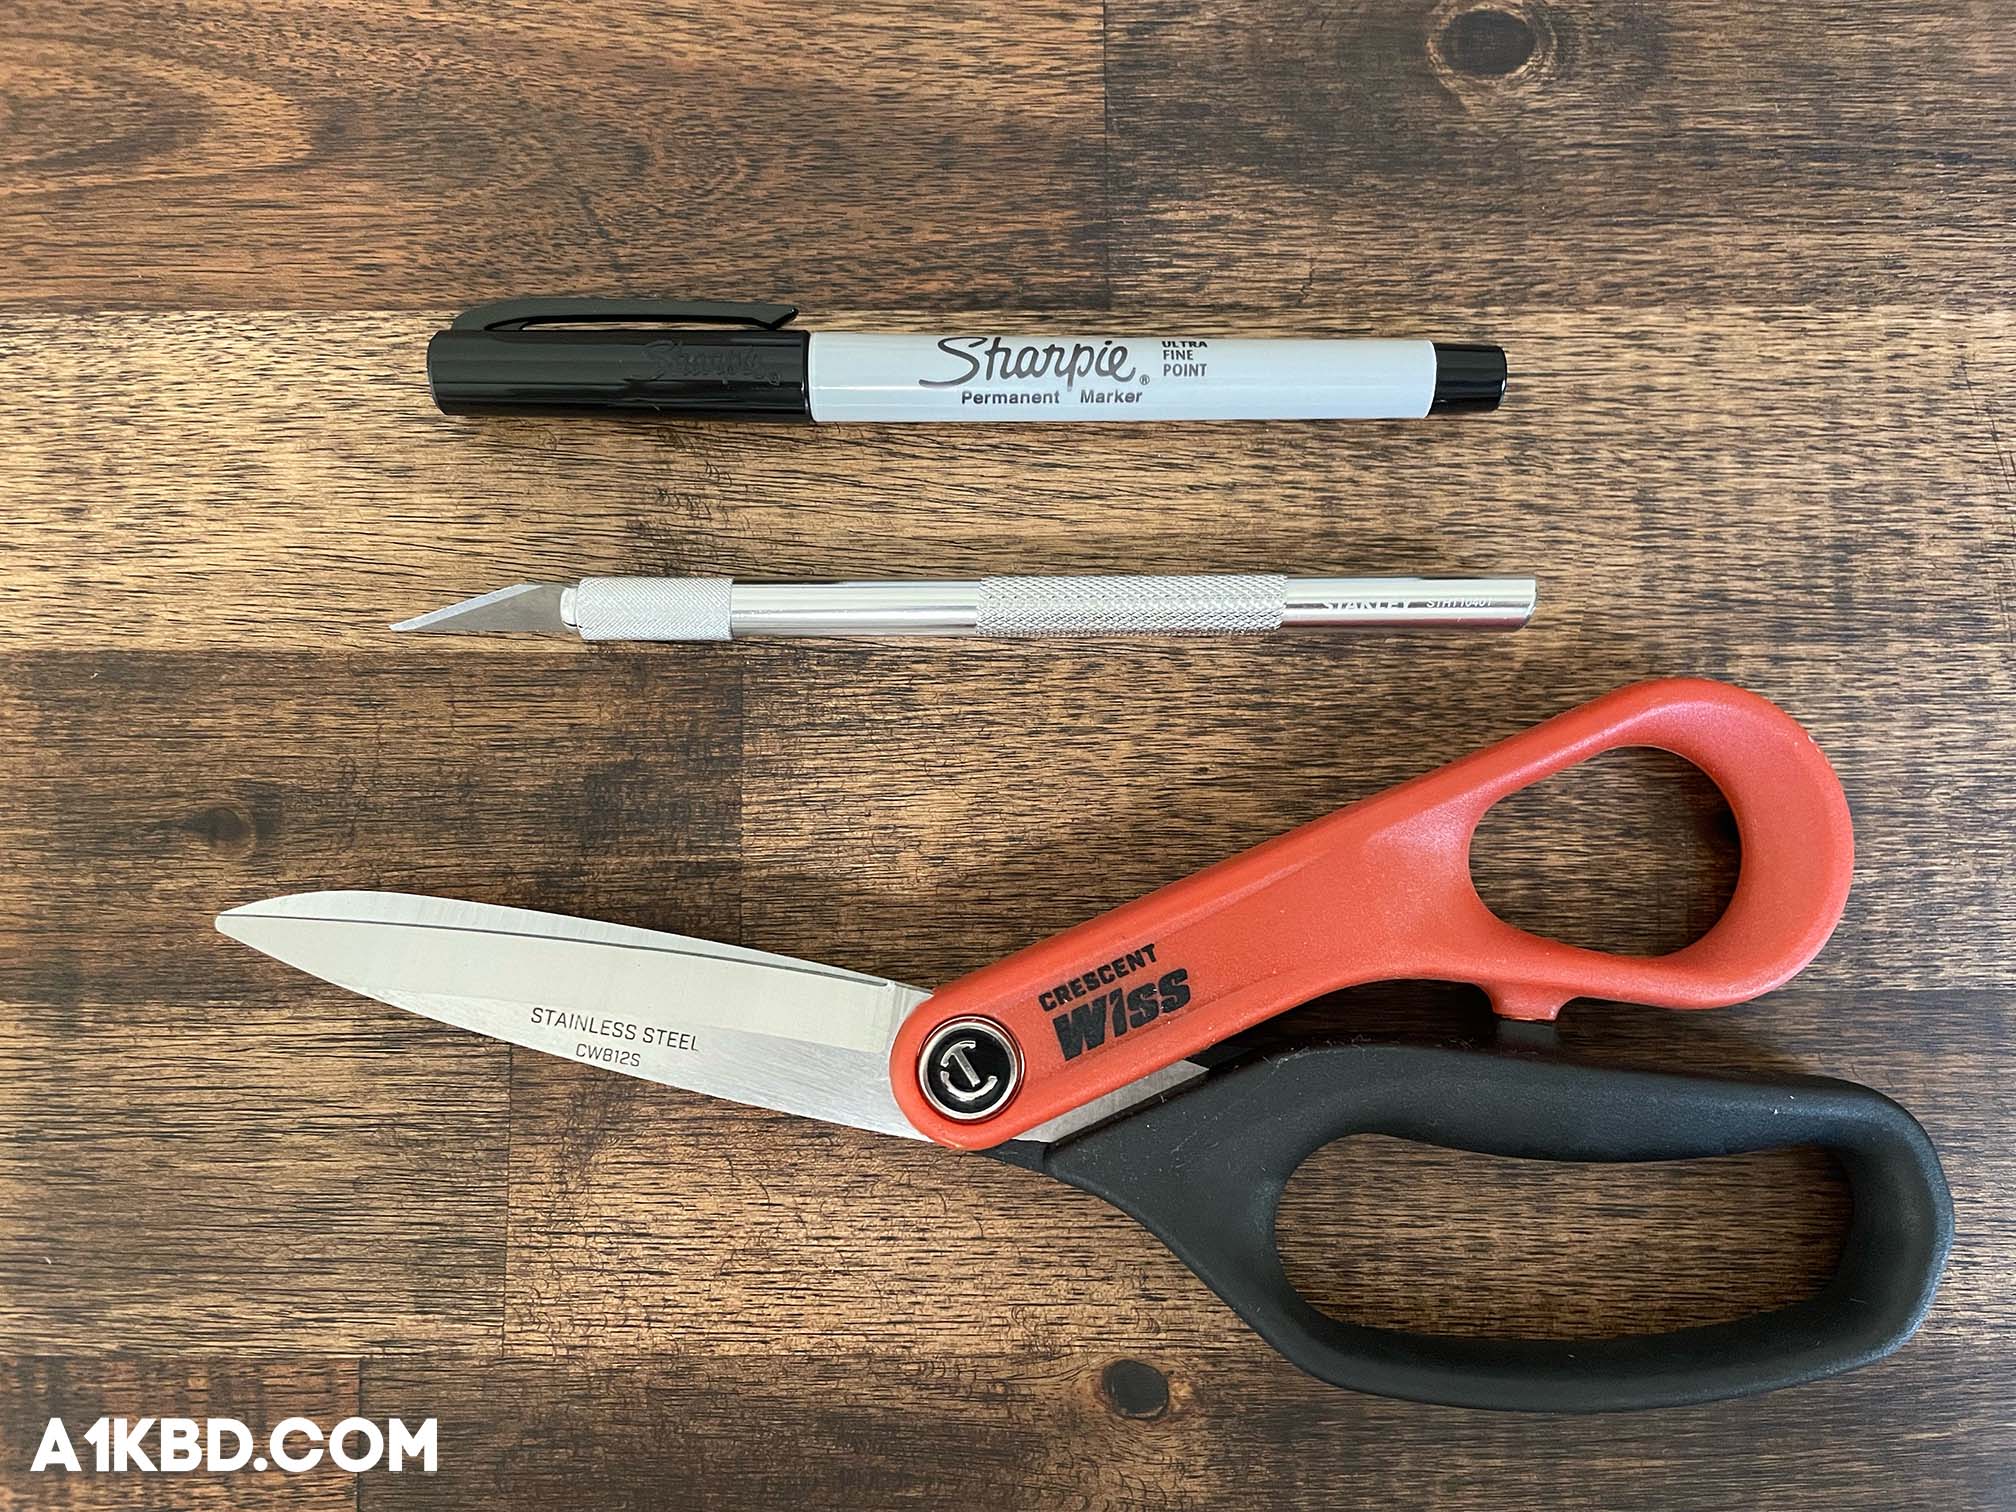
For this step, you’ll want to have a sharp/precise cutting tool. We recommend using a hobby knife or another safe cutting tool that has precision. Once you have removed your PCB, lie it carefully on a clean flat surface. Next, lay a sheet of foam over the PCB. Carefully cut around the PCB using any of our recommended precise cutting tools. Your sheet of PE foam needs to equal the PCB’s size after you’re done cutting. For a more accurate cut, trace around the PCB using a marker. We prefer a fine point permanent marker, but other household markers should work fine too. This way you have a foundation to go off when you are cutting the foam.
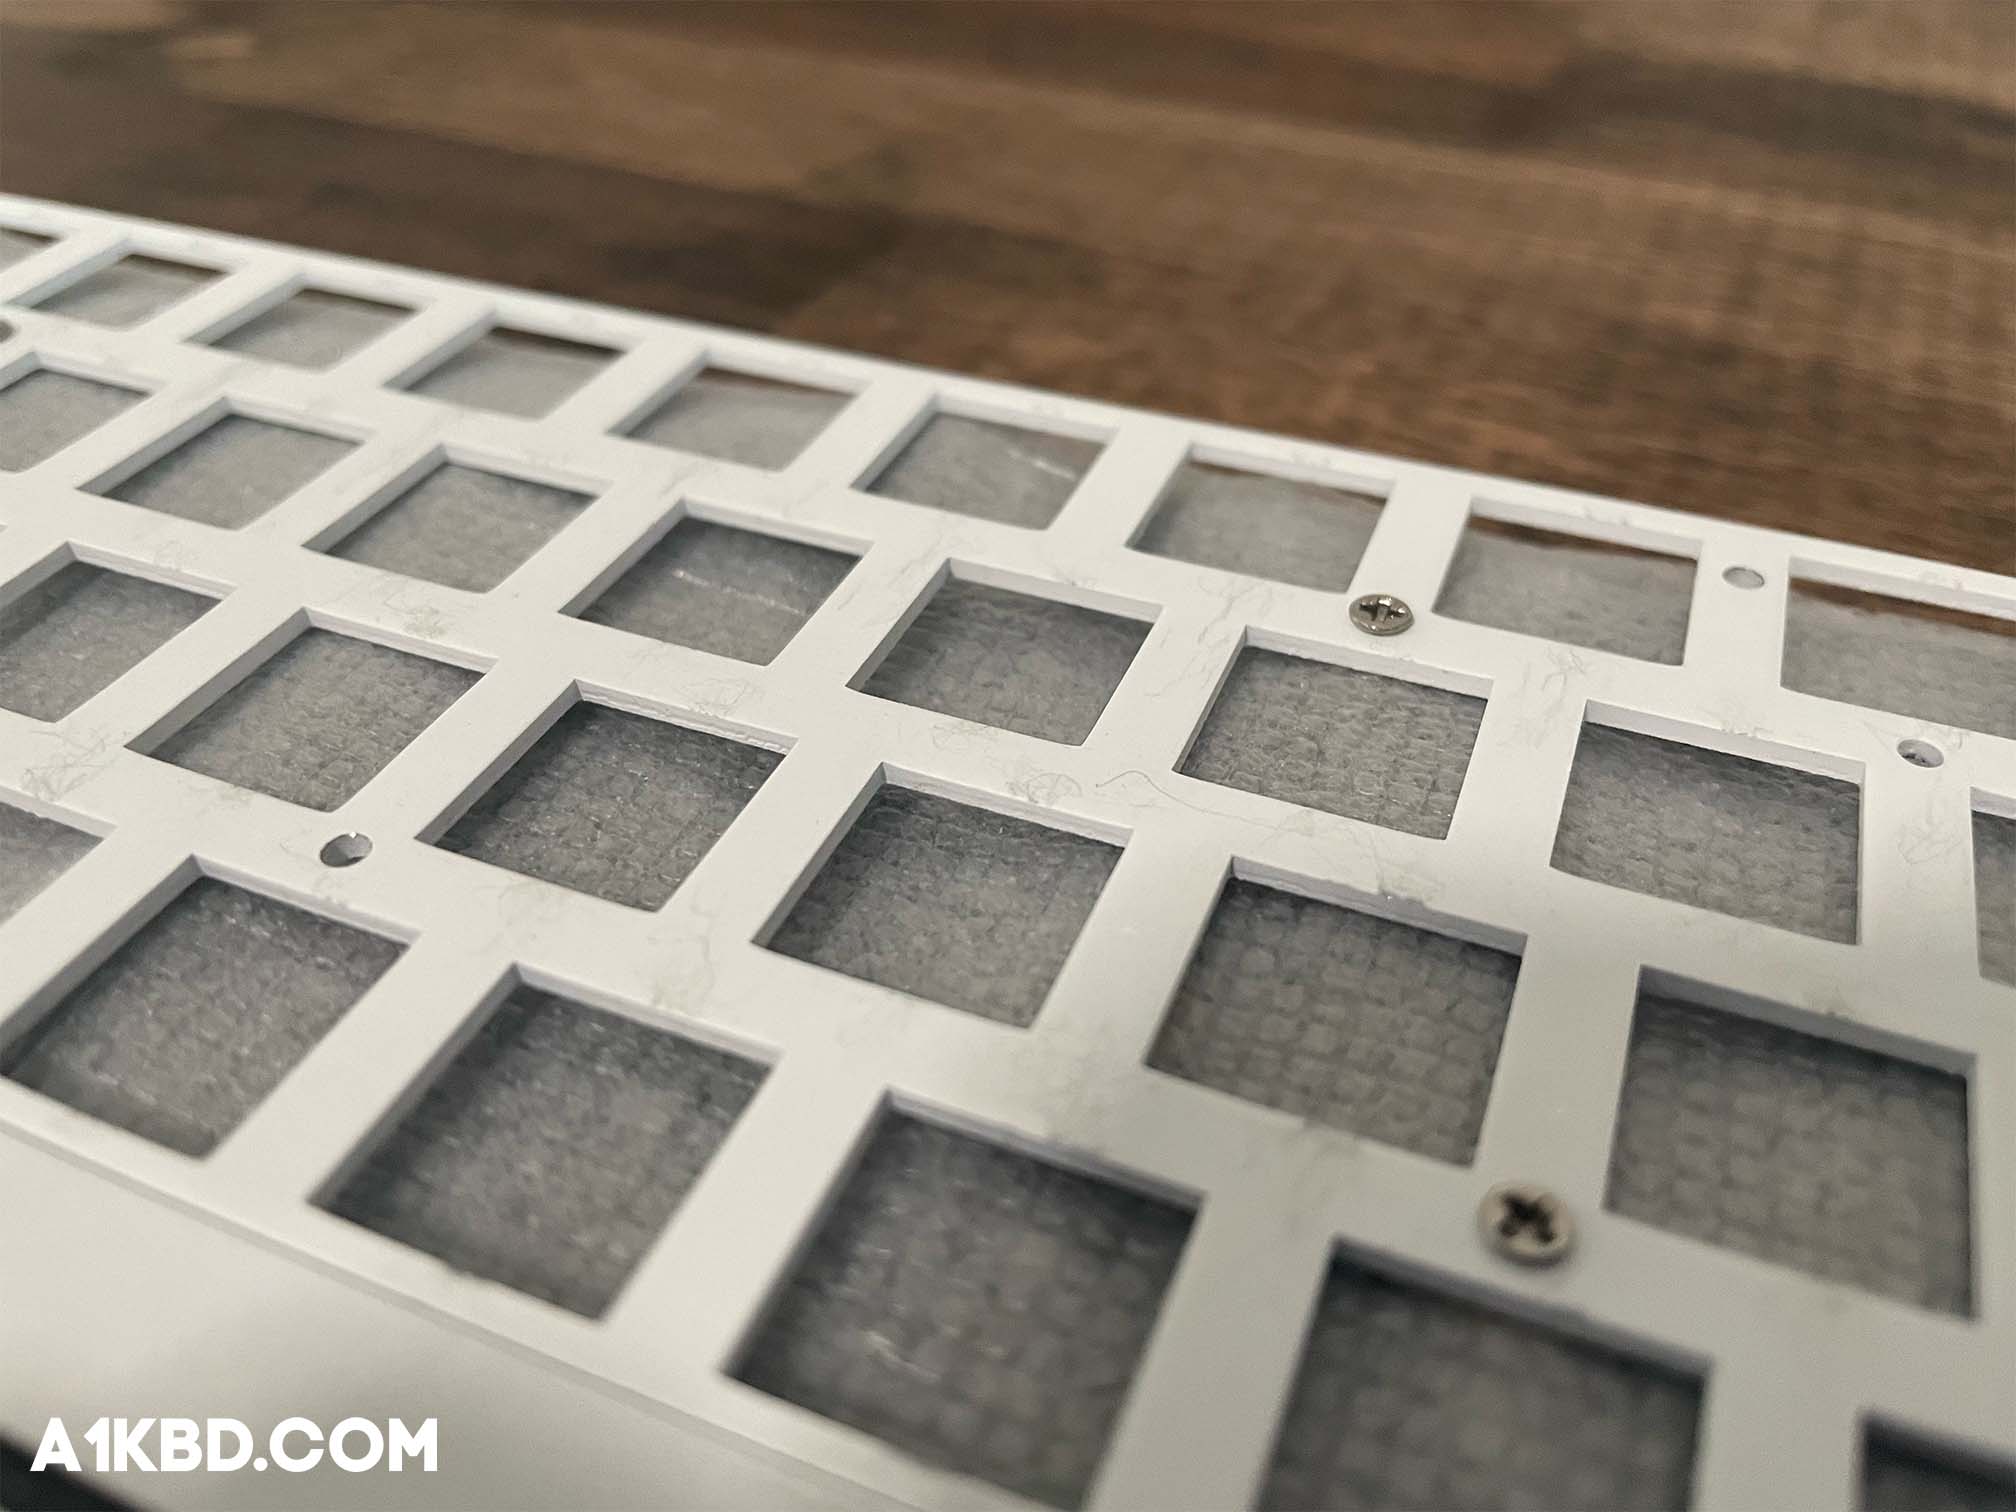
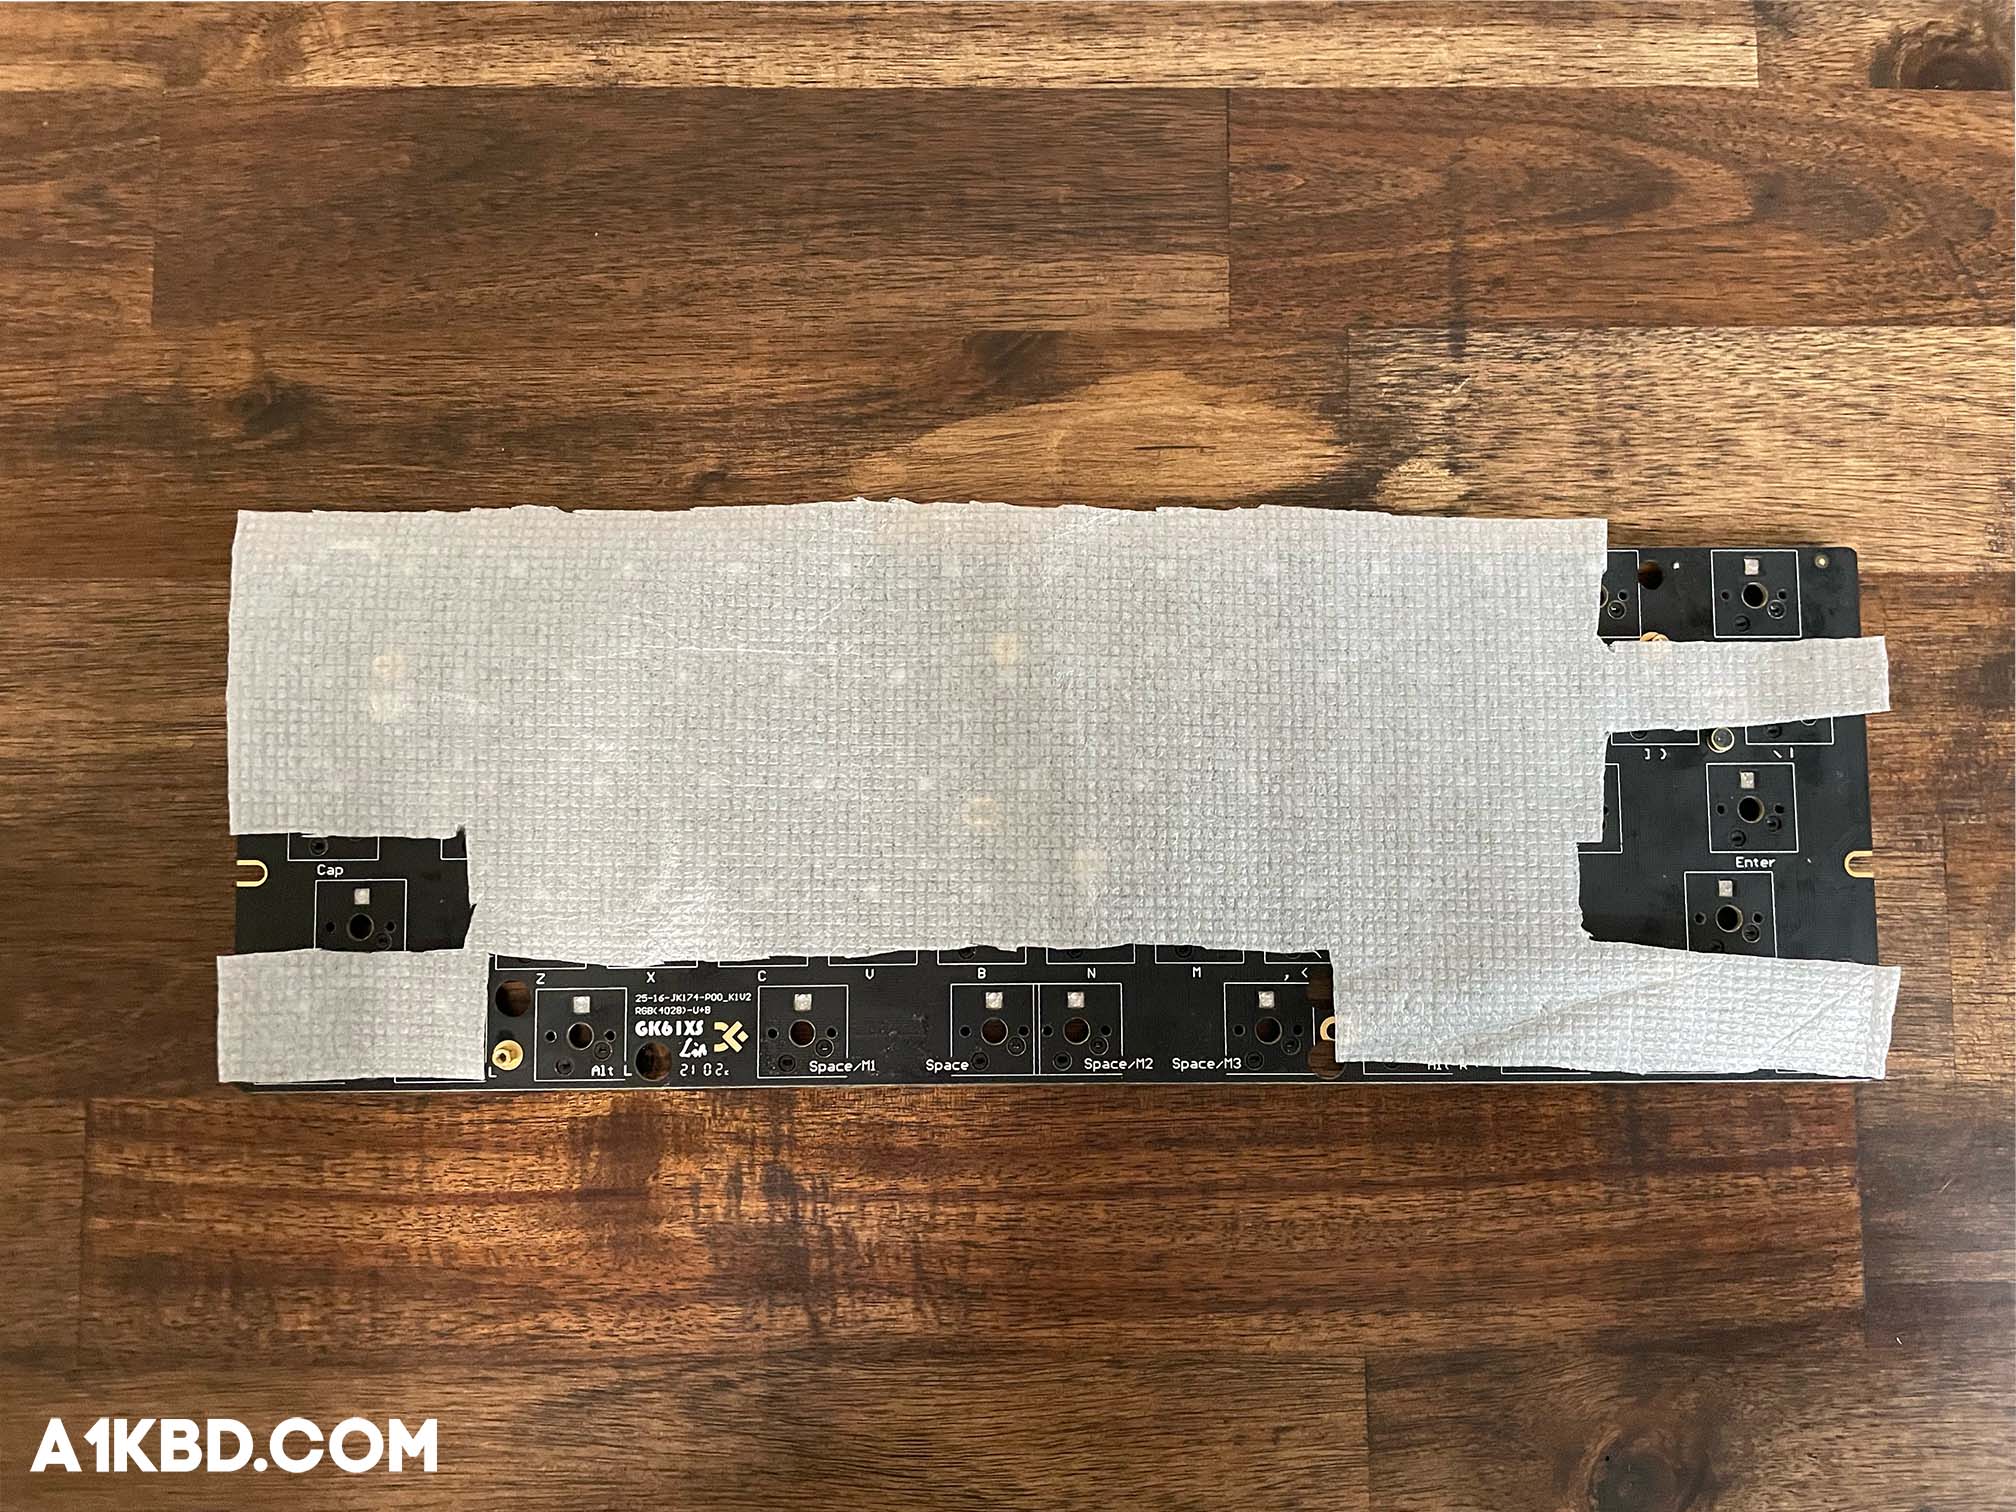
Step #3. Cut out Holes for the Stabilizers and Switches
This step is crucial to ensure the switches and stabilizers properly fit into your keyboard. When placing switches back into the keyboard, switch pins will pierce the foam with their sharp ends. However, the center largest plastic pin will have more difficulty puncturing the foam. To remedy this, grab a toothpick and start poking holes in the foam where the center pin would usually go through. Following this, cut out holes for the stabilizers and their wires. You can reference how cutouts should look below. If your PCB has built-in standoffs, puncture holes for them too. Note below, the foam does not have to be cut exact. Rather, the point is to cover as much of the PCB as possible with foam so the mod functions properly.
Step #4. Reassemble the Keyboard
Since there’s a variety of keyboards with contrasting assembly methods this section will be kept mostly broad. If you haven’t done so yet, place the now cut PE foam onto your PCB. Carefully place the plate on top of the PCB and fasten any screws that secure the plate to the PCB. Before installing your switches, meticulously check each metal switch pin for bends. Metal pins on switches have a high tendency to bend. With the addition of foam, your pins can bend much easier, so extra care and precision is key when installing them. To make certain your switches won’t plop out of the keyboard, swap a switch into every corner of the keyboard. Then, fill the rest of the keyboard with switches.
Can You Perform the PE Foam Mod on Soldered PCBs?
Contrary to other opinions, the PE foam mod should never be attempted on soldered PCBs. The heat produced from the soldering process can melt the foam, potentially cause a safety hazard, and in turn damage the PCB. On the off chance, no damage is caused, the melted foam will leave a very gooey and sticky mess. Do yourself a favor and avoid attempting the PE foam mod on a soldered PCB.
Are Switch Pads a Good Alternative to PE Foam?
Switch pads are a great substitute for PE foam in the sense they come in more materials than just PE. Switch pads also offer EVA and poron as alternatives. Poron and EVA also provide different acoustic profiles to their PE foam counterpart. Solder-only switch pads are also available for sale meaning the mod can also work on soldered PCBs. The only downside to switch pads is that they take longer to apply, however, the extra customizability is well worth the compromise.
Is the PE Foam Mod Safe?
Keyboard PCBs hold barely any static charge because they rarely get touched. This will most likely be different if you are a frequent modder and tinker with your keyboard often. In that case, anti-static PE foam may be necessary if you want to avoid any risk. However, if you occasionally fiddle with your keyboard everything should be fine. Keyboard PCBs are resilient to static meaning so chances of anything happening are slim. Though keep in mind, black foam should be avoided since it contains carbon which is conductive.
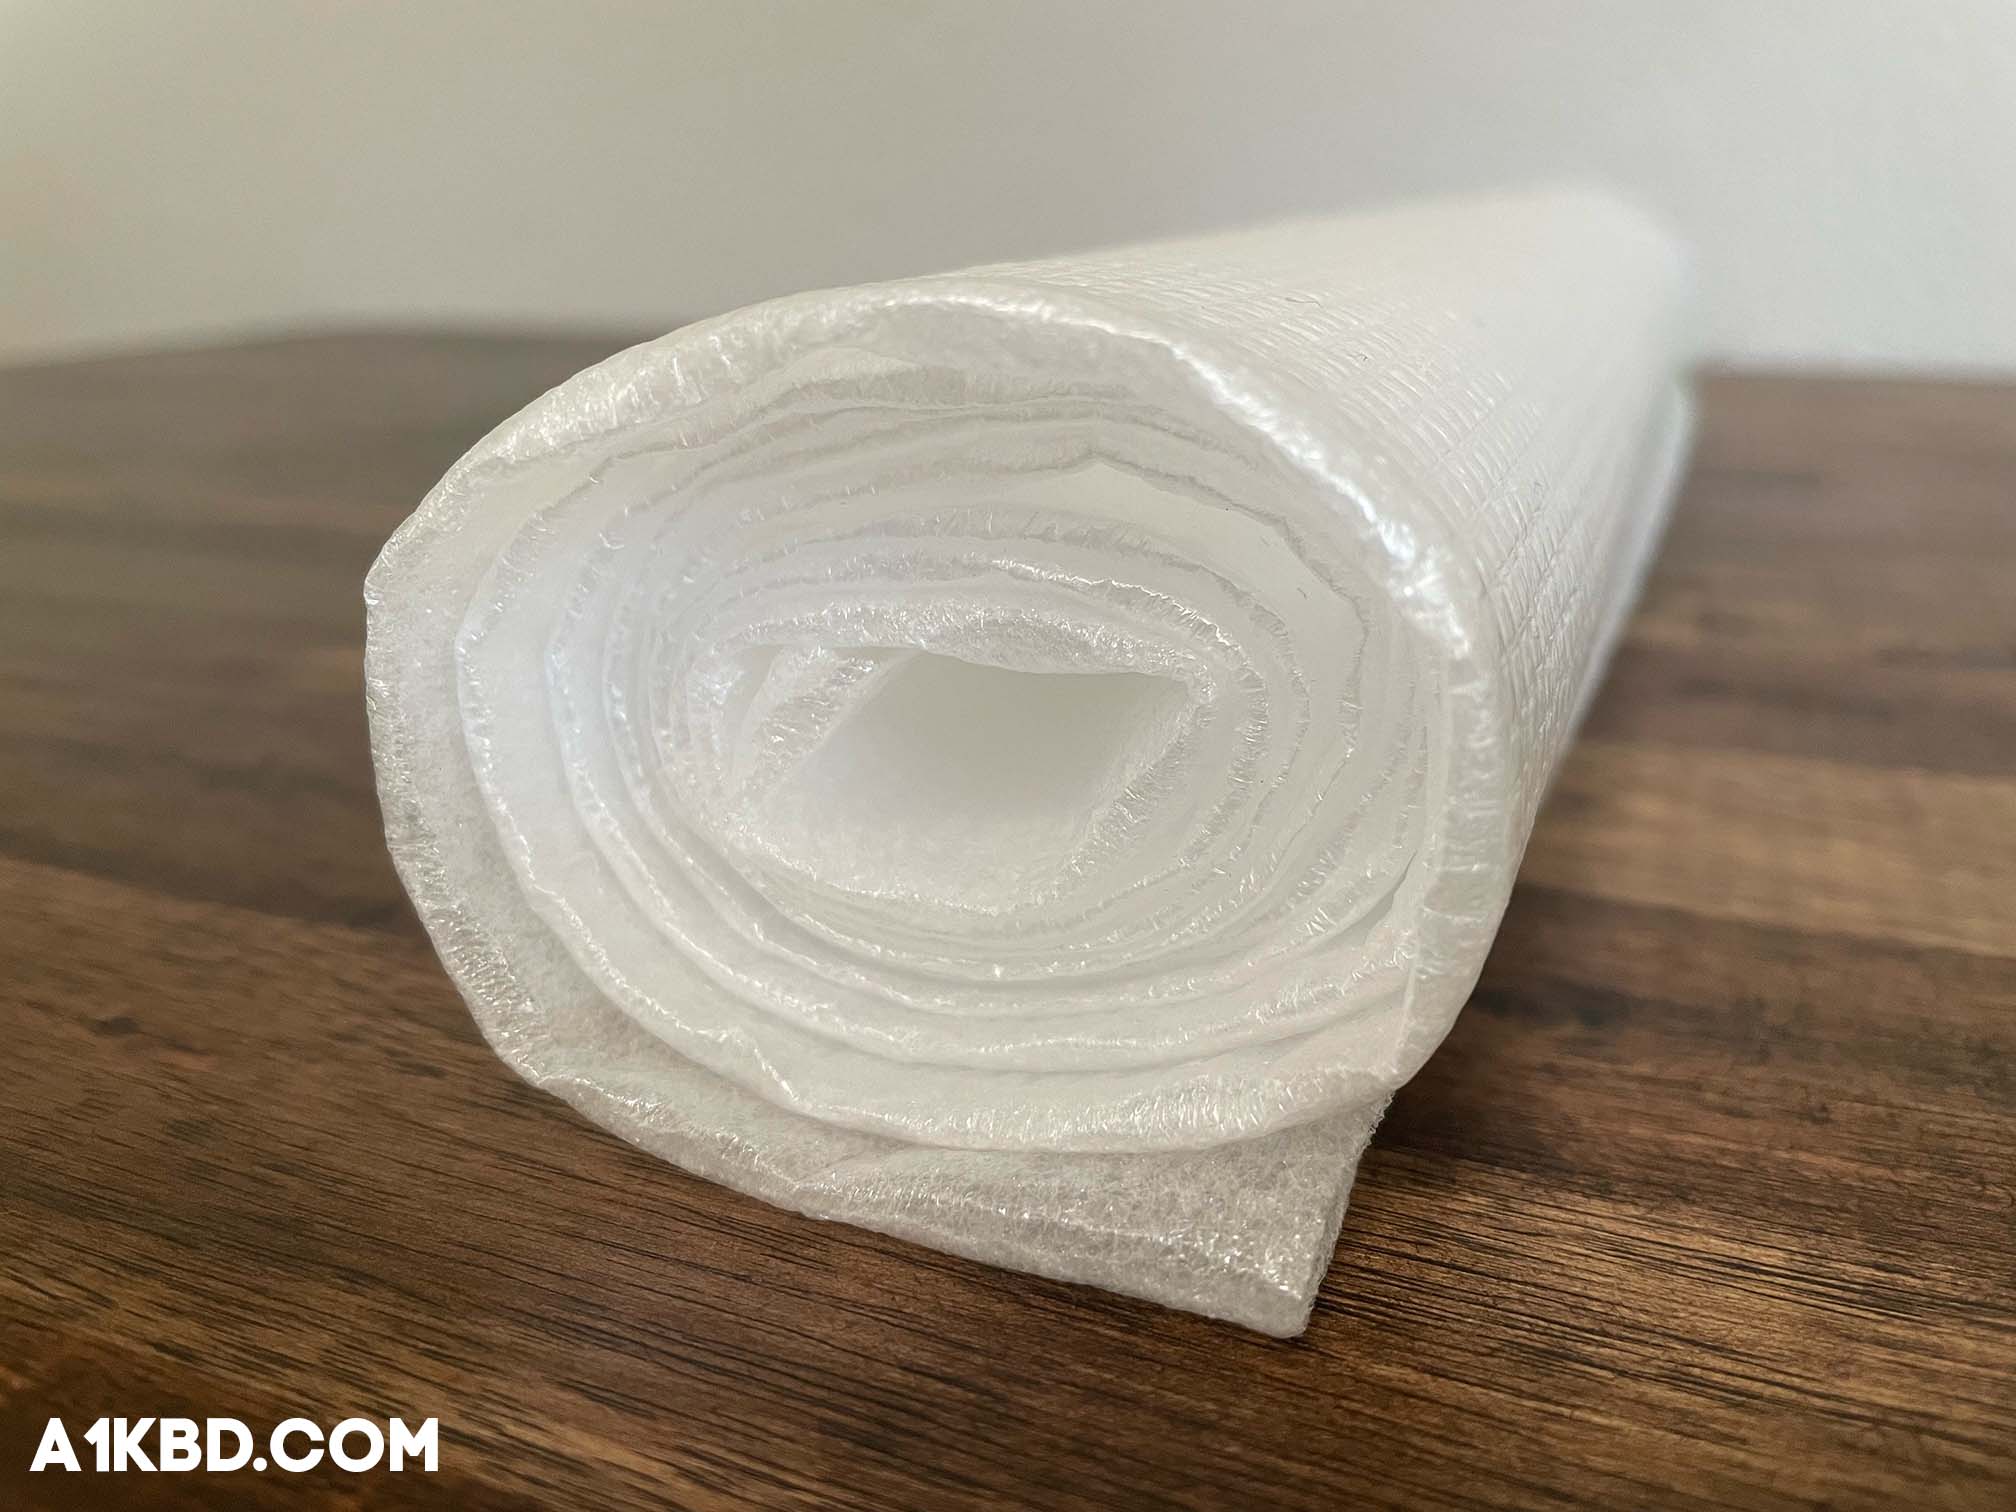
Where Can I Buy PE Foam?
White polyethylene foam is often used as a packaging material and is found in most shipped goods. If you don’t have any foam lying around, it’s available for purchase online. We like this roll of PE foam because not only does it have an ideal thickness, but also it produces astounding results.
Conclusion
Overall, the PE foam mod provides surprisingly impressive results for its very low price. The mod is easy to accomplish, and it enhances a keyboard by giving it a “marbled” sound signature. It can even make a budget board sound endgame. If you’re interested in bringing your keyboard to the next level, make sure to check out our article on the tempest tape mod. We hope this article was informative (and/or helpful) in delivering enough information so you can try this mod too.
Thanks for reading and happy typing!